
Ready to learn more?
The Calendar feature helps set and manage schedules effectively using time slots, by facility and by provider as based on their availability.
The various tools of the Calendar window will help,
- Set schedules date wise, week wise/ month wise
- Set, edit or delete appointments
- Create, delete or modify the category of appointments
- Change the display styles of appointments as desired
- Print appointments
- Control access to Calendar feature.
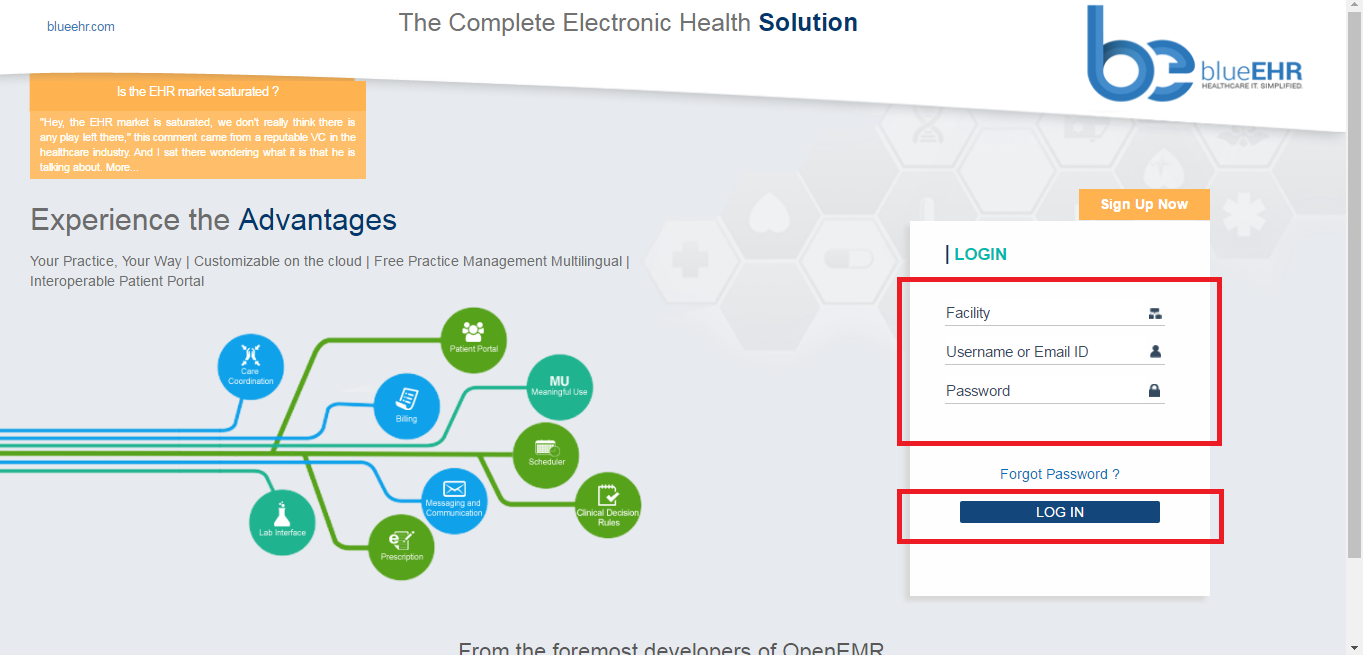
- Open the BlueEHR web page.
- Enter your login credentials (Facility name/ Username or Email ID and Password) and click on Log in

In case you forget your password, click on the Forgot Password? option to generate a new password.
- In the Home page, Click on the Menu icon
 at the top left of the screen.
 - Click to Select Calendar
 from the drop down options in the Menu.
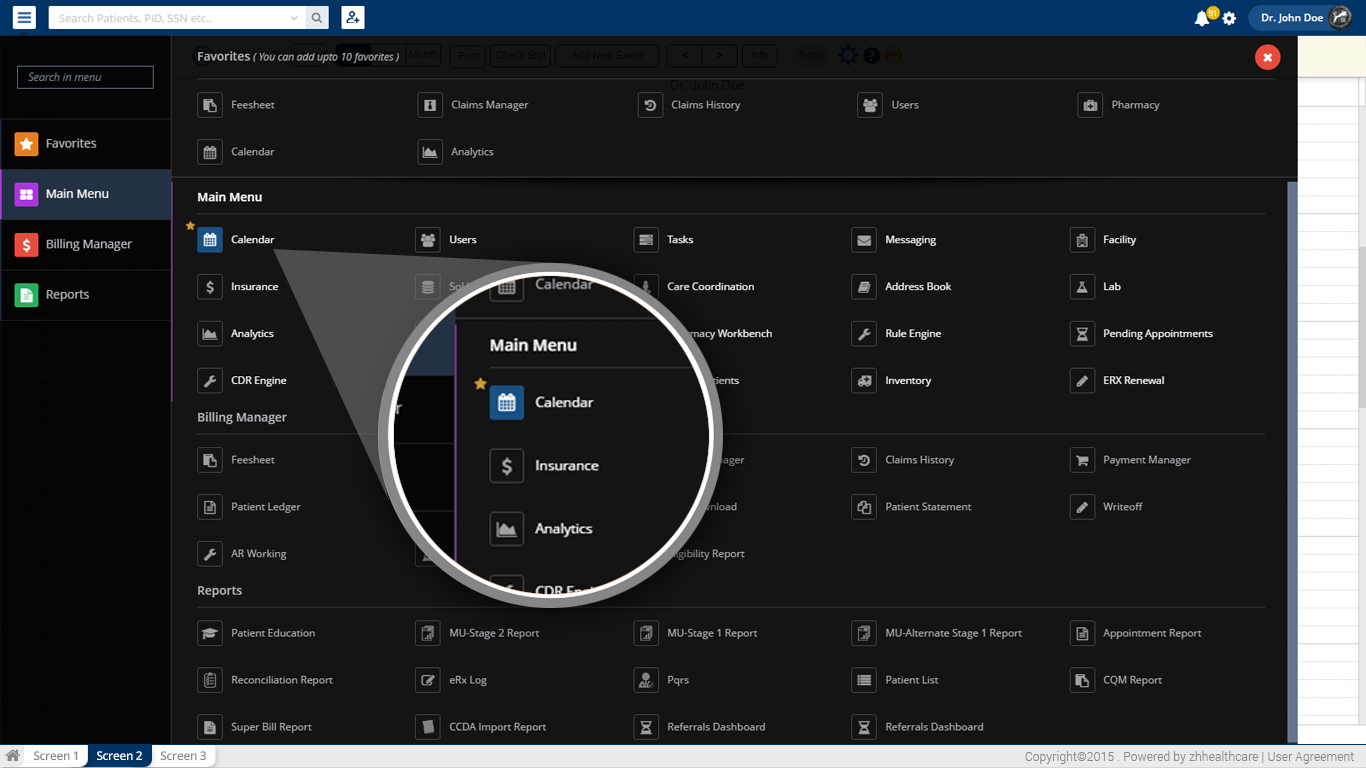
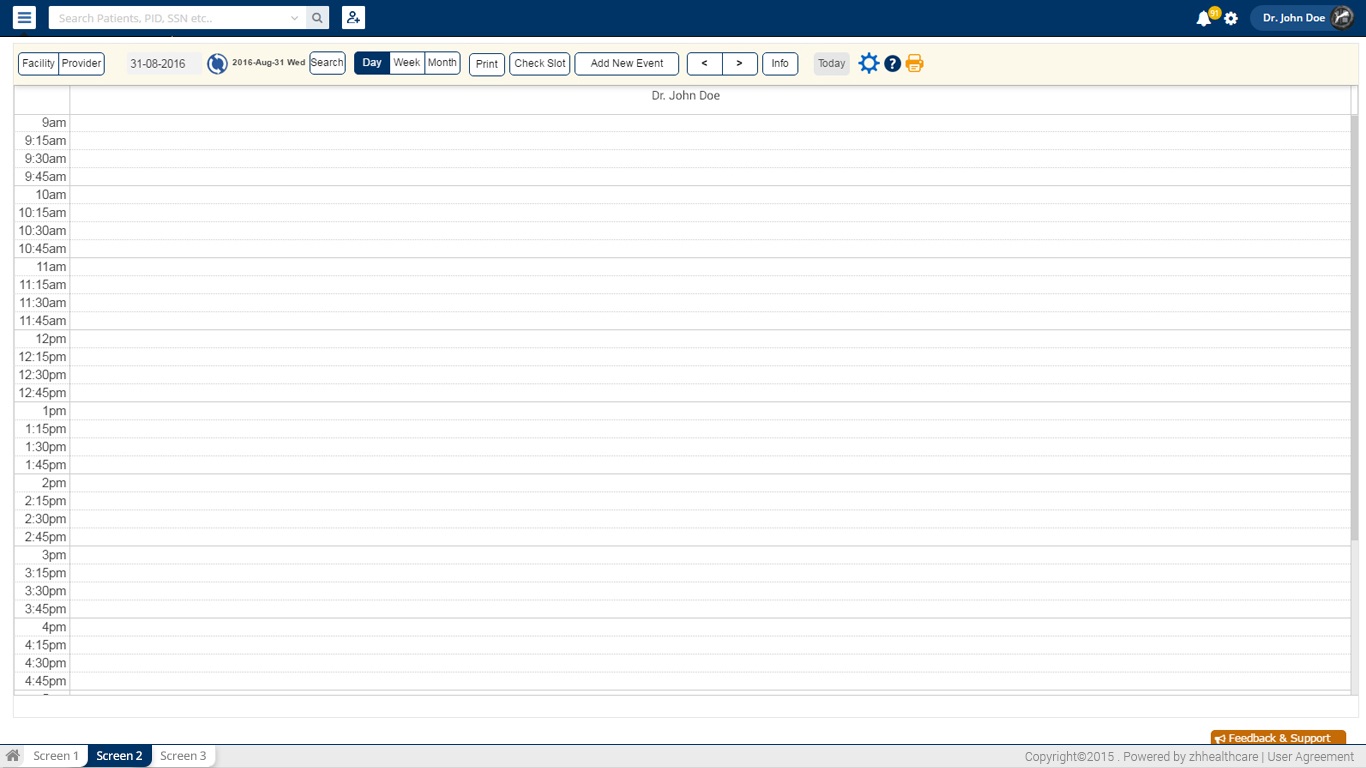
This opens an empty Calendar window.
BlueEHR has provided ‘categories’ within the calendar module. Where a category is in fact an appointment type. This feature allows the users to identify the appointment type and hence the reason for visit.
blueEHR allows users to
- See categories or appointment types that are already created in the system
- Edit the categories
- Delete categories
- Add new categories.
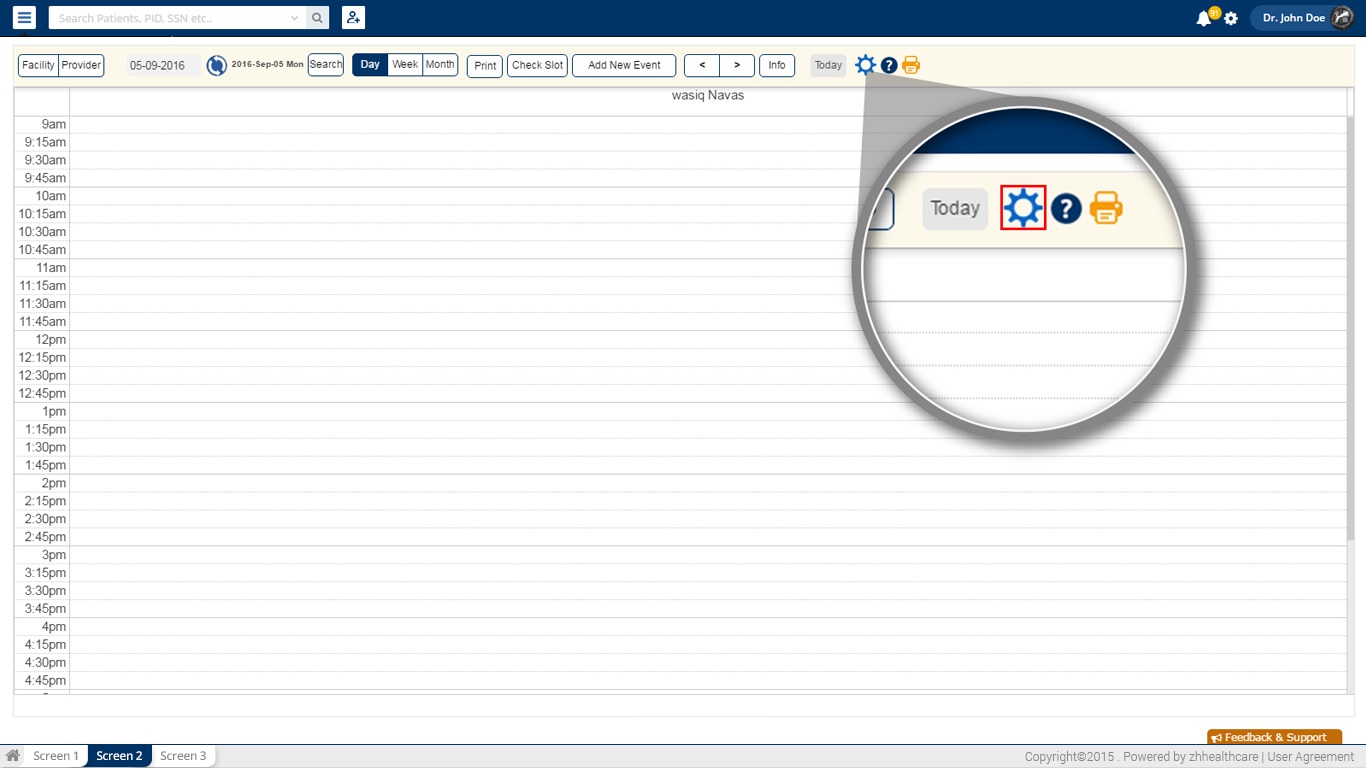
Viewing the categories –
- Click on the Settings
 button at the top right corner of the screen. This open the Categories window that shows the existing list of categories.
- This window has the following elements,
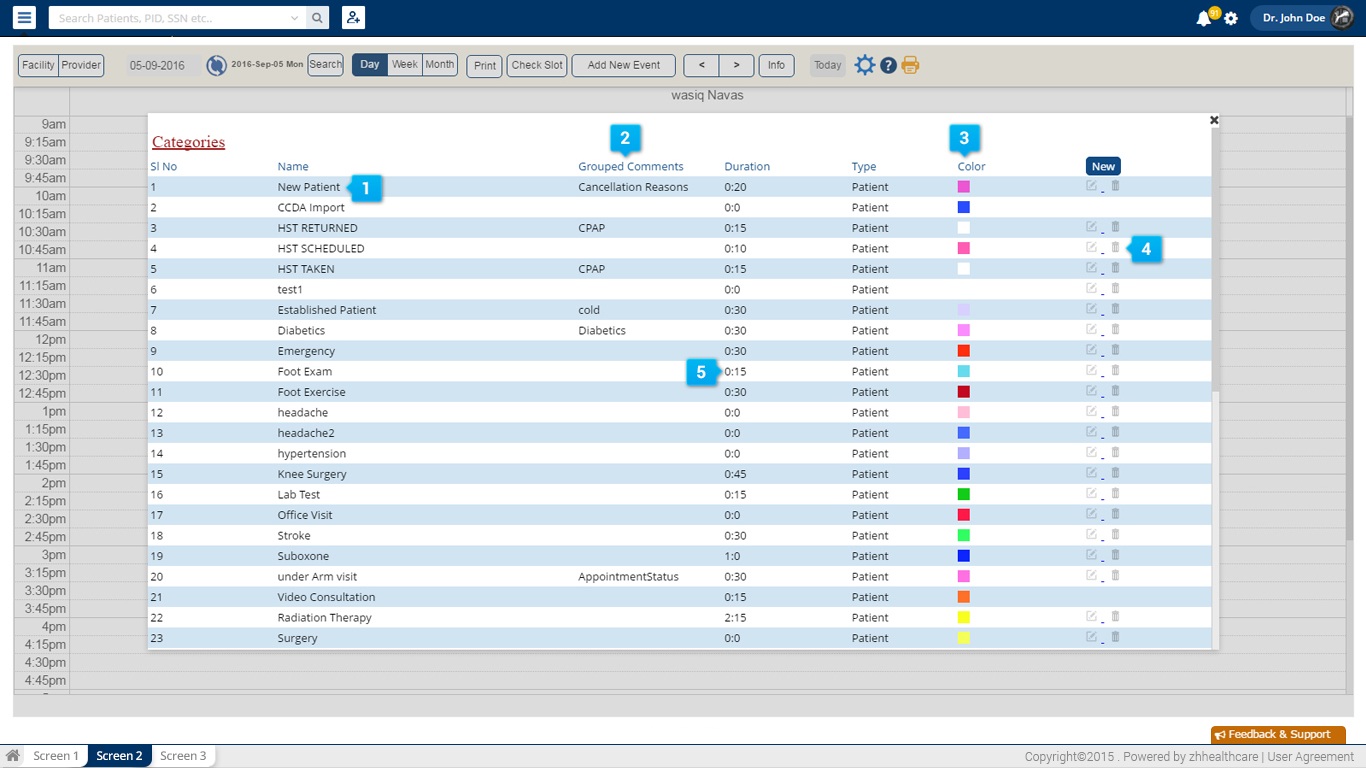
Where:
|
Editing a category –
- Click on the Settings
 button at the top right corner of the screen to open the Categories window
 - Navigate to the row of the category that needs to be edited. Click on the edit
 option under the New tab for the respective row.
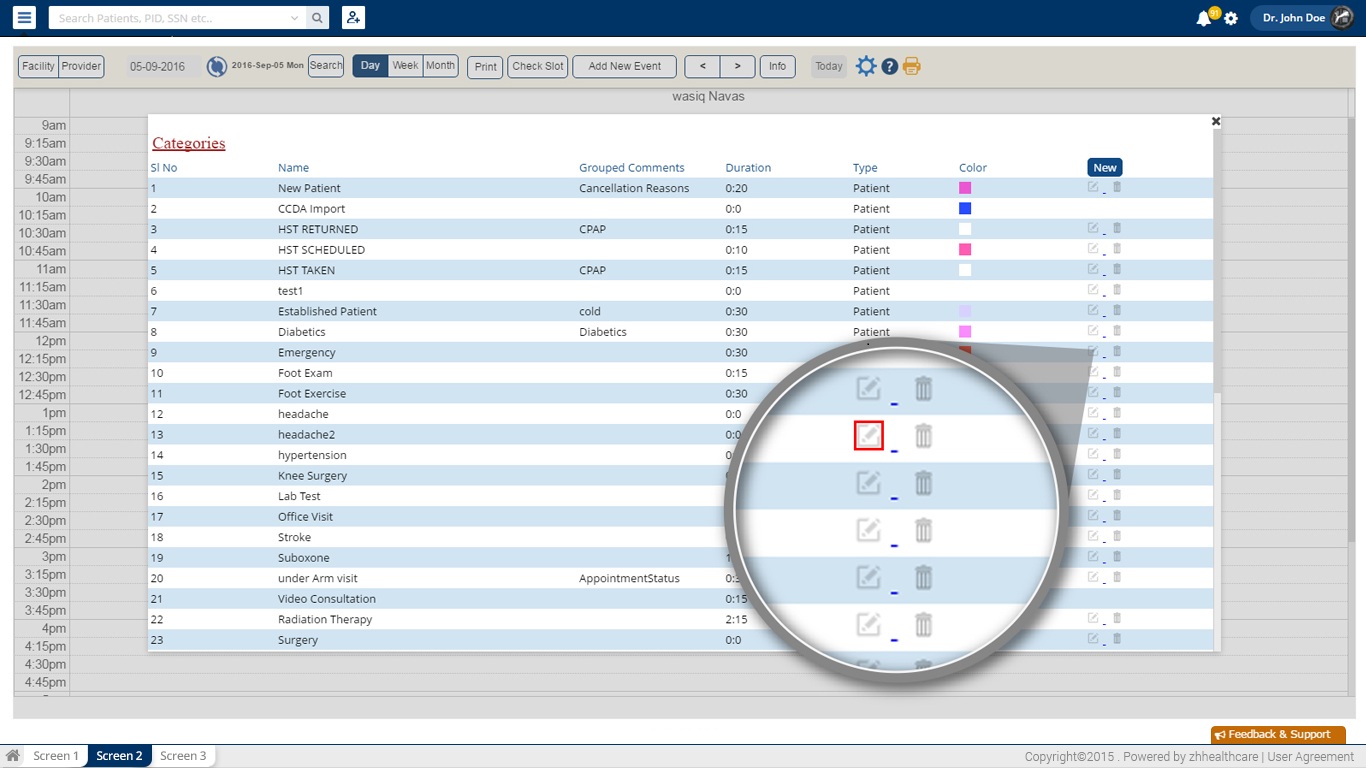
- An Edit Category window opens. Use the options provided to edit the following:

- Alter the Name of the category/ appointment type.
- Change the Color of the category/ appointment type
- Alter the Duration of the category, appointment type
Note: Use the Back button or the X in the left corner of the screen, to exit from the Edit Categories window.
Deleting a category –
- Click on the Settings
 button at the top right corner of the screen to open the Categories window
 - Navigate to the row of the category that needs to be deleted
- Click on the Trashcan
 icon under the New tab for the respective row. This deletes that particular category.
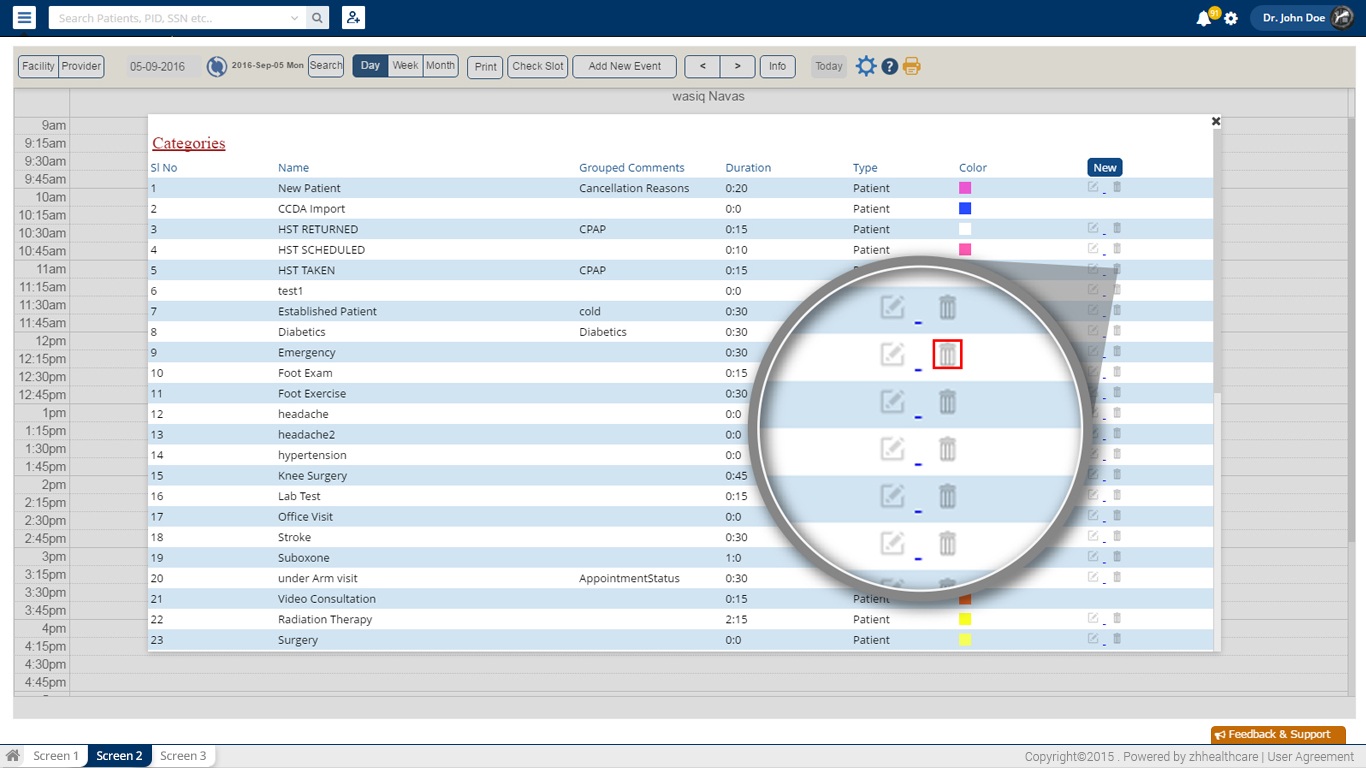
Note: Categories without the Trash can icon ![]() next to them are system generated categories. These cannot be deleted.
next to them are system generated categories. These cannot be deleted.
blueEHR allows the user to control several settings for the Calendar module. The Scheduler Settings provides options for the same.
Once all of the facilities have been added to the system, the following will need to be done before the calendar can be used:
- Decide on who can access the calendar and provide access accordingly
- Control how the event or the appointment display will look
- Activate certain key information necessary when scheduling an appointment.
Accessing the Scheduler Settings Module –
- Click on the
 icon at the topmost right of the screen.
 - In the drop down menu that appears, choose the Module Installer option
 .
.
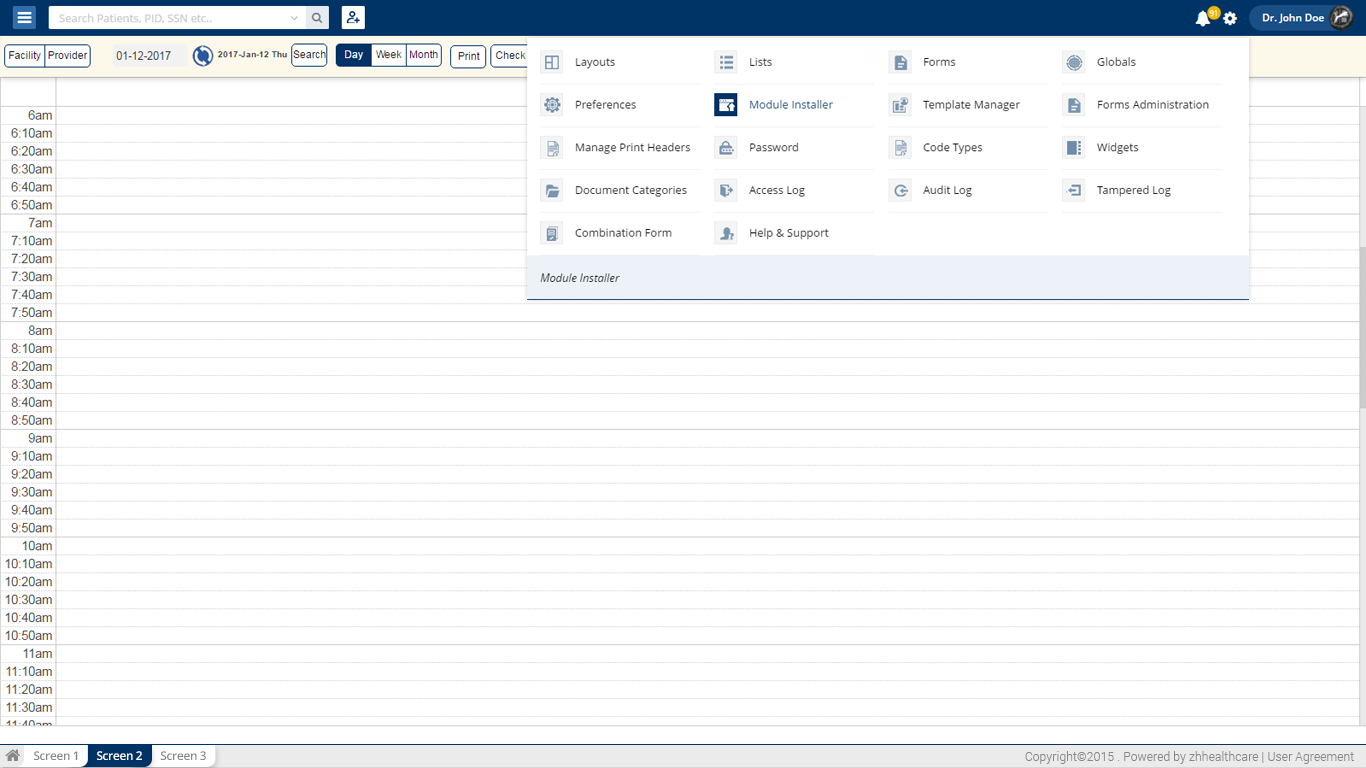
- This opens a window that displays the available set of Modules.
Where:
|
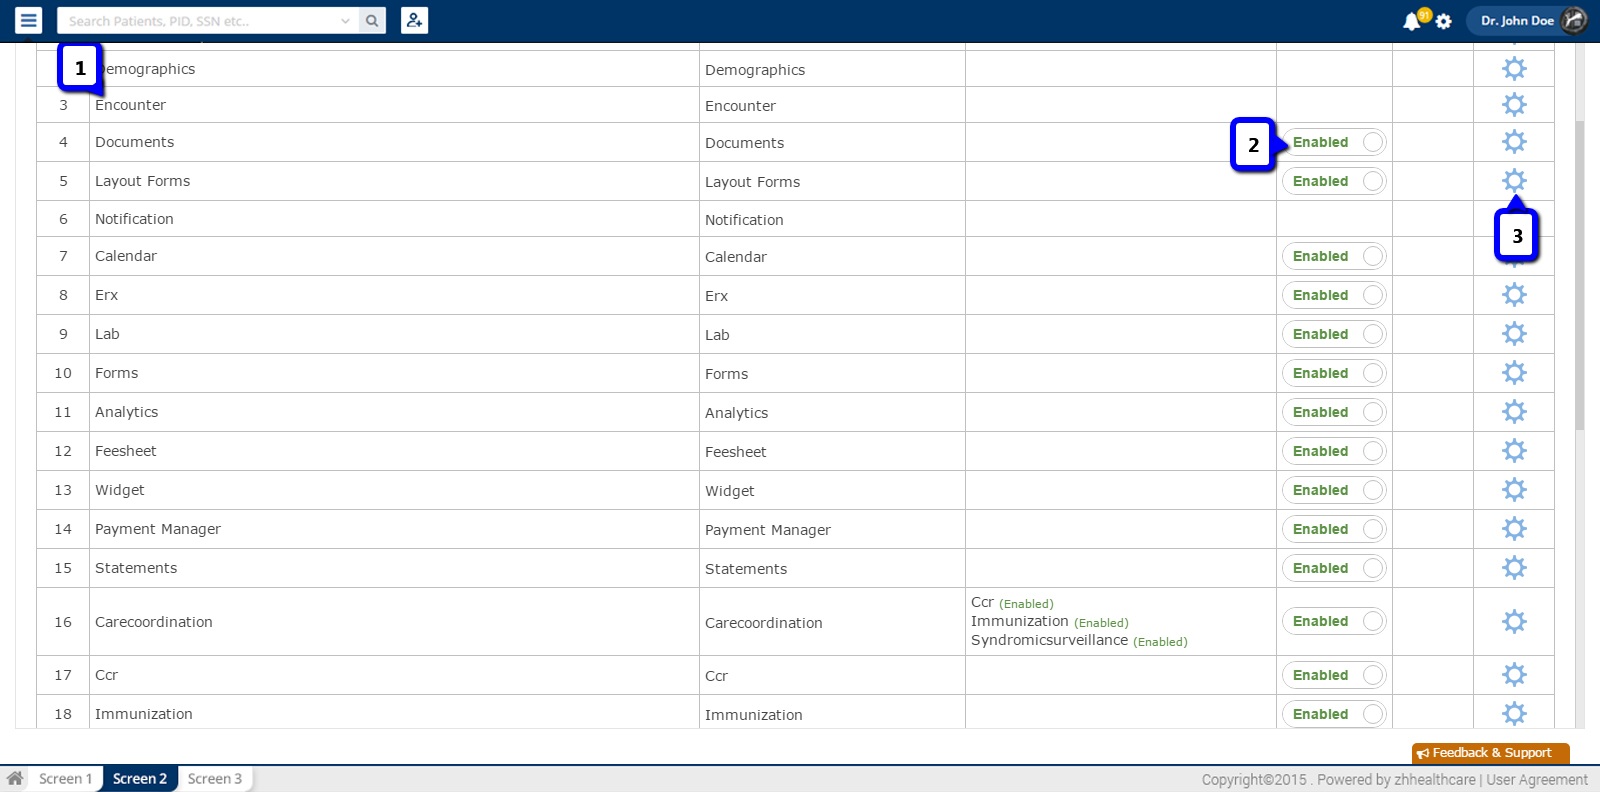
To open the settings for the calendar module:
- Navigate to the row showing the Calendar module. Click on the settings icon at the rightmost end of this row.
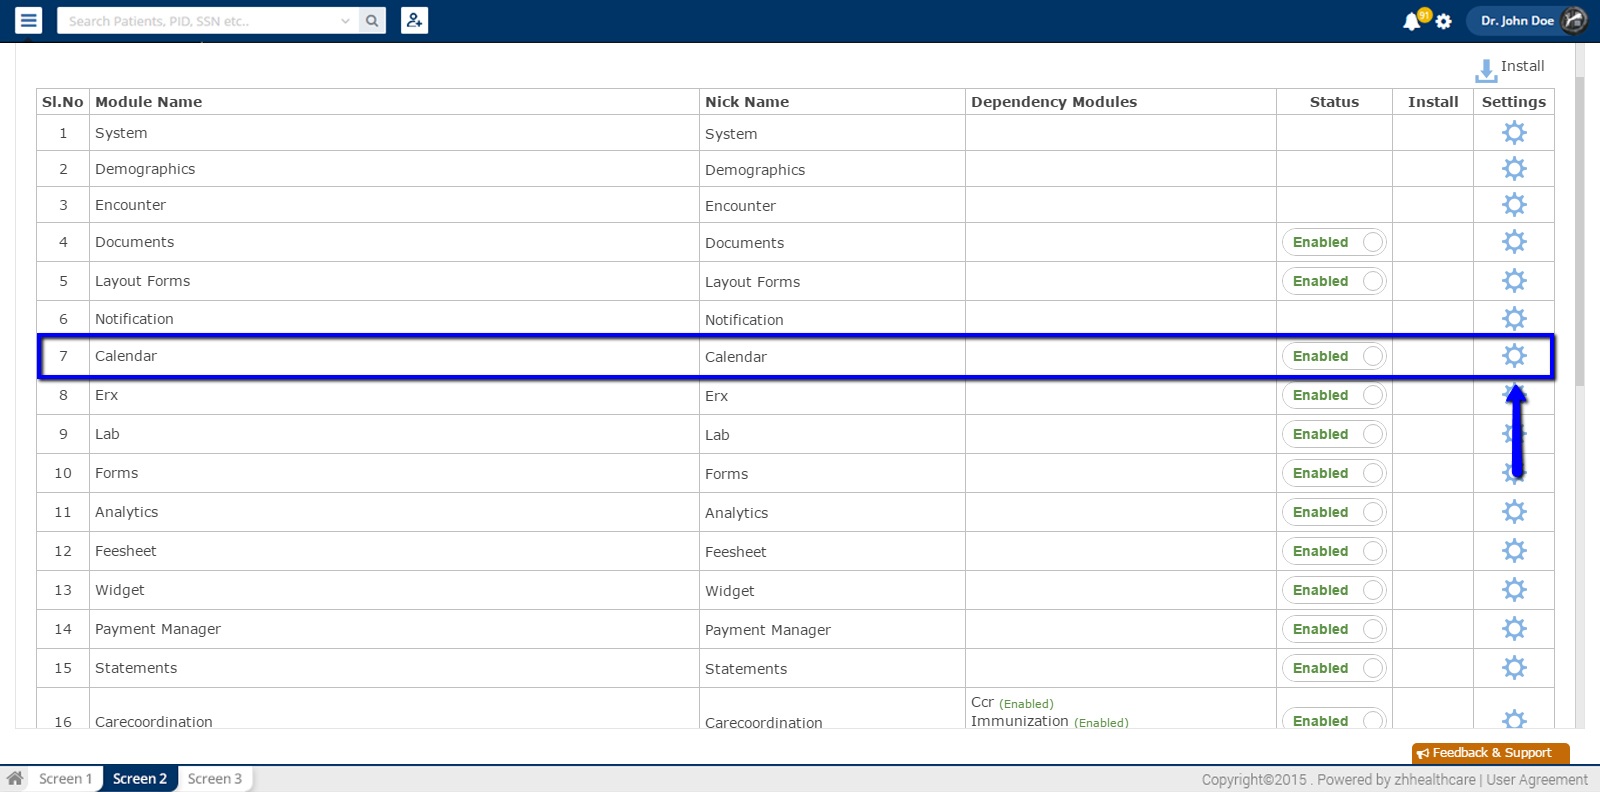
- This opens the window having three tabs: Access control, Settings and Advanced.

Using the Access control option in the Calendar Module Settings –
The Access Control option of the Calendar module allows the user to allow/ deny access for other users.
- In the Settings window, click on the tab Access Controls.
- This opens a window showing the list of personnel with access to the system
- Every personnel name is accompanied by an Allowed/ Denied toggle button.
- Click on the left side of the button to allow access

- Click on the right side of the same button to deny access


Configuring the display settings in the Calendar Settings –
The Settings option of the Calendar module allows the user to make changes on how certain areas will appear in the appointment screen.
- In the Settings window, click on the Settings tab.
- This opens a window showing the different Settings that can be changed.
 Display Style
- Click on the dropdown next to Display Style. This offers different display styles for the appointment in the scheduler.
- For example, if you want the Facility details and then the Appointment details to appear, choose the required option. The display will appear as shown.

Appointment Display Style
- Click on the dropdown next to Appointment Display Style. Allows the user the choice of how they would like the patient’s information to appear on the calendar.
Restrict Provider Changes
- Click on the dropdown next to the Restrict Provider Changes The ‘ Yes’ or ‘ No’ option allows you to restrict changes to the provider listed ( without prior approval) while making appointments.
Start and End time
- Click on these drop down boxes to set the Start time and End time for appointments.
- The start time indicates the time for the first appointment and end time indicates the time for the last appointment of the day.
- Enter the time in both the boxes using the hh:mm format (hour: minutes)
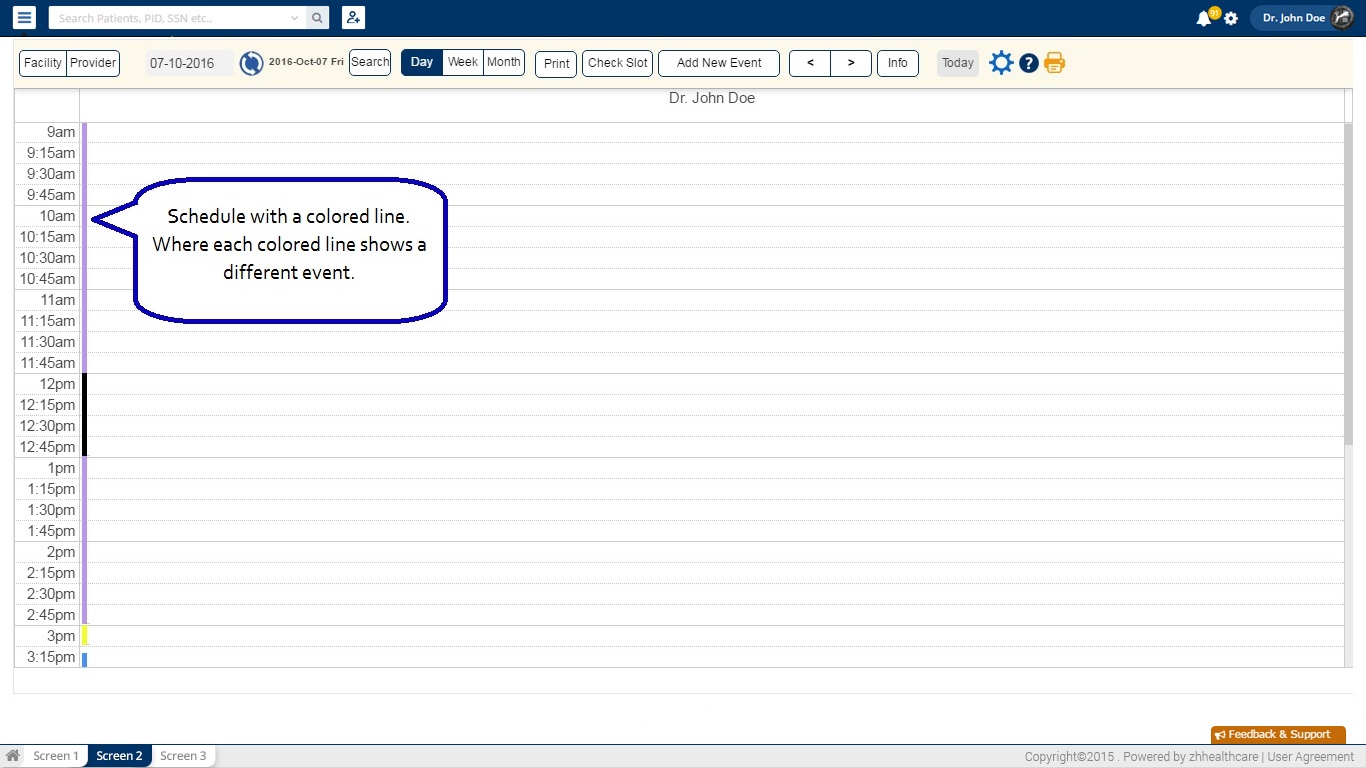
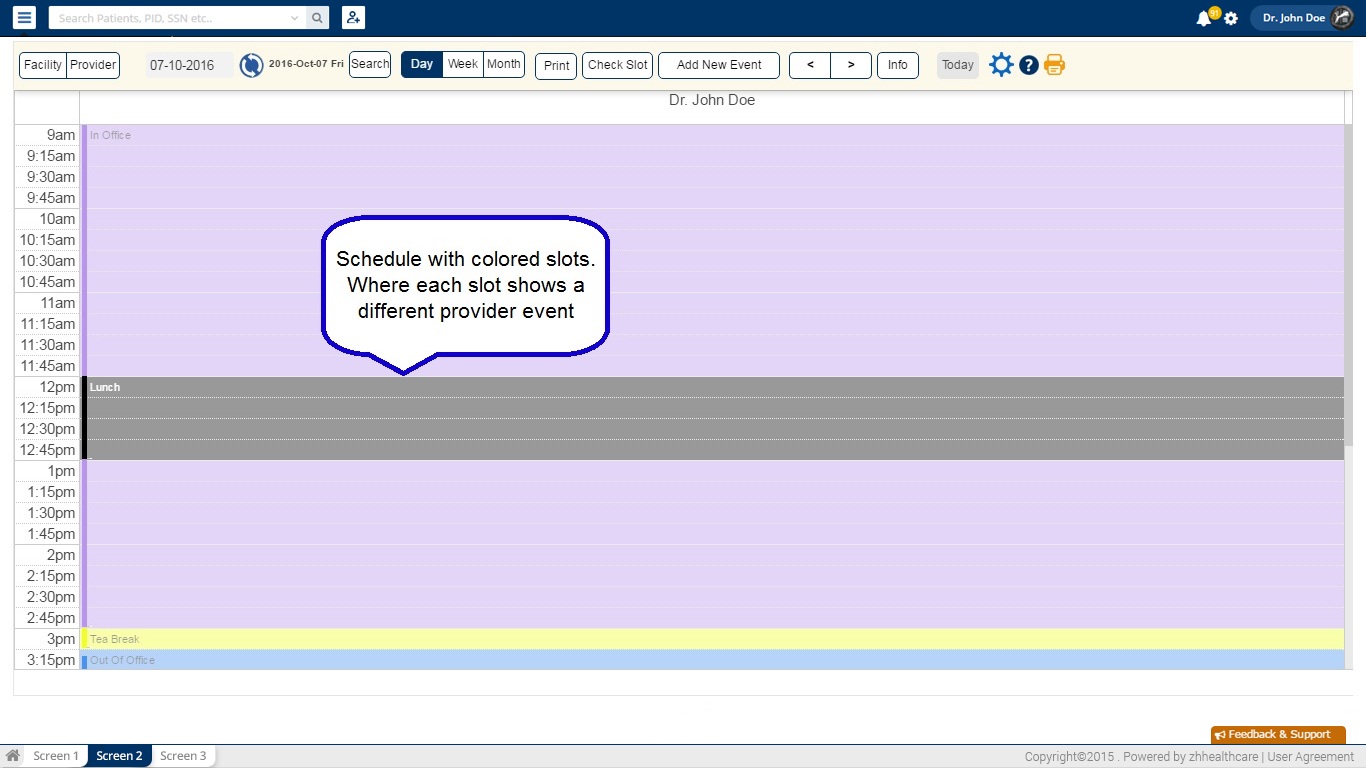
Provider Event Display Style
- Use the drop down next to the Provider Event display style to decide how you want the events to appear on the Calendar.
- There are two choices- a colored line can appear on the schedule or colored appointment slots as shown below.
 Setting Provider Off days
- Use the drop down next to the Off days’ option to choose the day when the provider is Off.
Restricting Appointments when a provider event is not selected
- If no provider event is set and the Restrict Appointment when Blank option is selected as ‘yes’ this will prevent any appointments being made on this.
Controlling the maximum number of appointments being made in a slot
- The blank space below the Maximum number of Appointments in a slot, allows the user to set a maximum number of appointments that can be scheduled at one time.
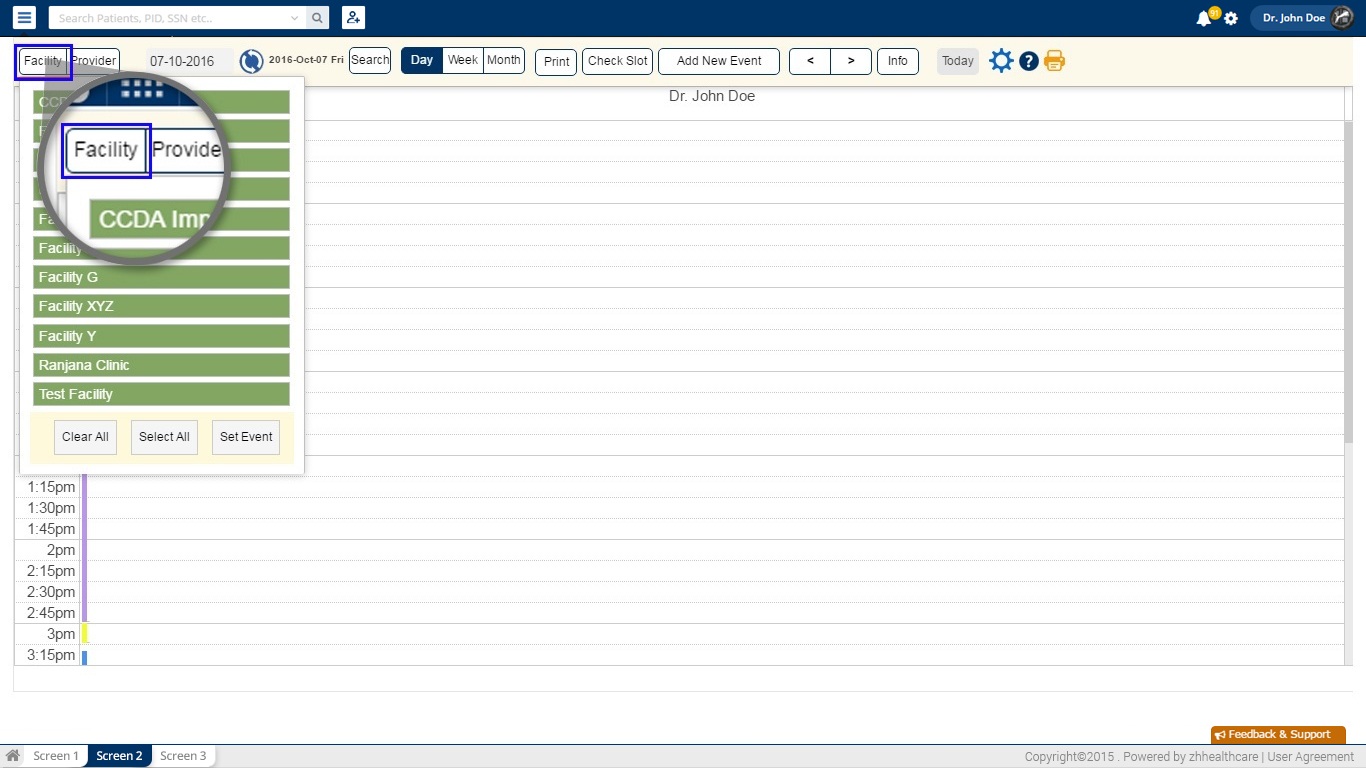
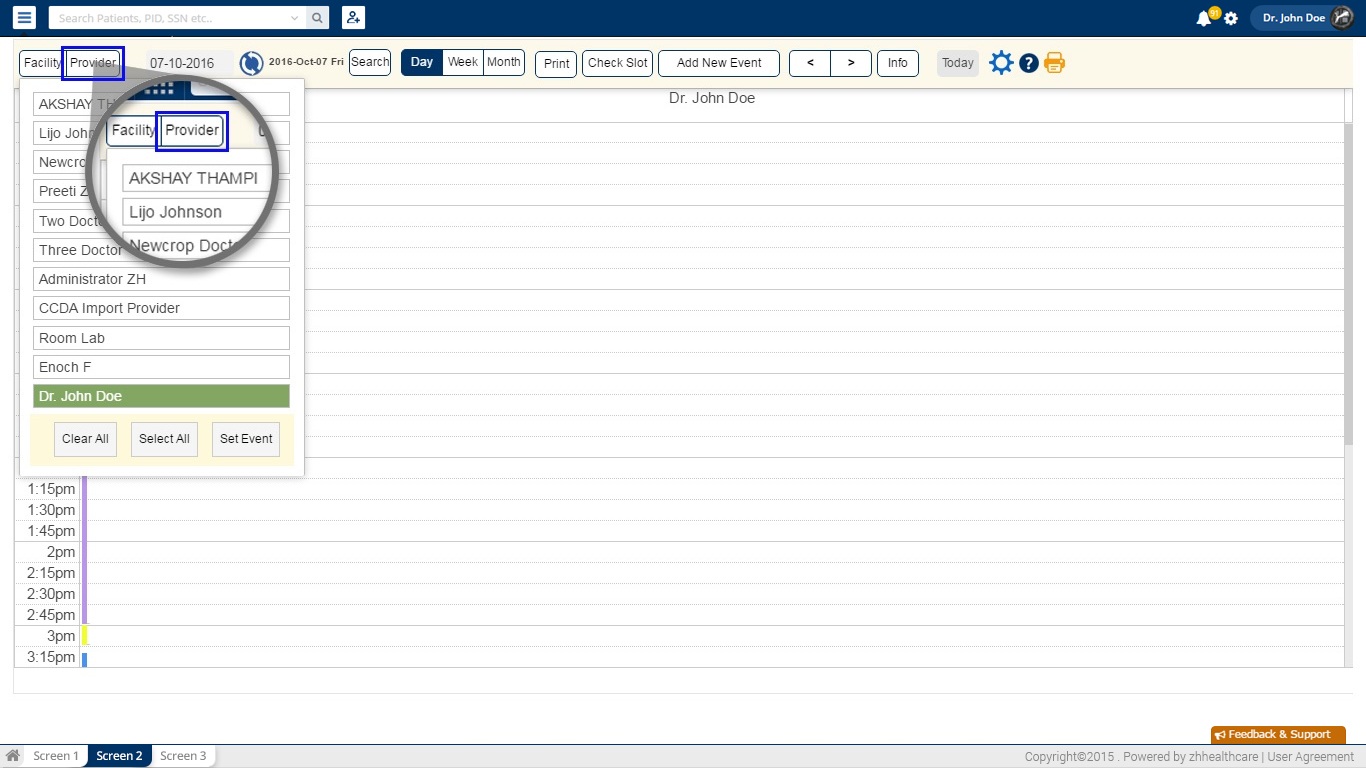
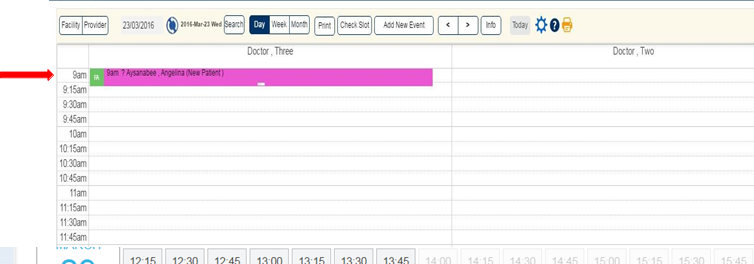
To view the schedule for one or more facilities.
- Click on the Facility option on the top left corner of the screen.
- In the dropdown that appears, select one or multiple facilities you would like to view the schedule for.
- Selecting the Set Event option will refresh the calendar and then display will show the appointments for the chosen facility.
To view the schedule for one or more providers.
- Click on the Provider option on the top left corner of the screen.
- In the dropdown that appears, select one or multiple provider(s) you would like to view the schedule for. Use Select All to select every provider on the list.
- Selecting the Set Event option will refresh the calendar and then display will show the appointments for the chosen facility.
A provider event reflects statuses such as ‘in office’, ‘out of office’, ‘vacation’, etc. To set a provider event:
- Click on the Provider name at the top of the daily schedule.
- In the Add Provider Events box that appears, use the drop-down under Category to choose the desired event.

- Set the date of the event under the Scheduled window.
- Add the start time of the event under the Time tab and the duration of the event under the Duration tab.
- Comments if required can be added for an event in the calendar.
- If this event is one, which will occur more than once, make it a recurring event by simply clicking on the Recurring Events box.
- When selected, this will allow a user to decide how often this event will re-occur, when this will re-occur, the first time this event will occur and when this event will end.
- Click the Save button and the calendar will refresh and reflect what has been created.

The help button will take users to the blueEHR home page, the user will select the Academy option at the top of the page. This will open an additional page where help documents and videos will be available to assist the user in gaining a better understanding of each feature.

To Select a Specific Date:
- Select a specific date by clicking on the date on the top. A drop down calendar will open.
- Users can select a date in the current month or use the Next button to move between months.


The Calendar window provides the ability to display a calendar in three Modes-Date /Week / Month wise.
- Click to select the relevant option from amongst the three buttons at the top of the
 Calendar window.
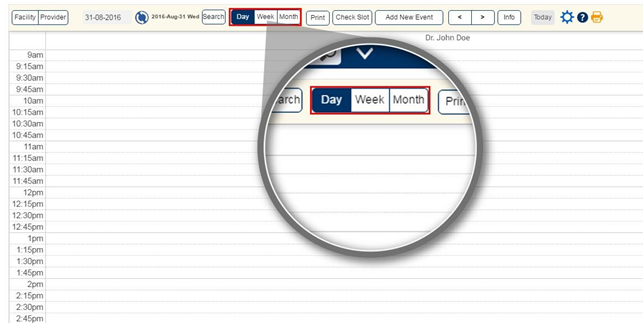
NB: If viewing schedules of multiple providers simultaneously, the system will allow only a date wise view and not a weekly or monthly view
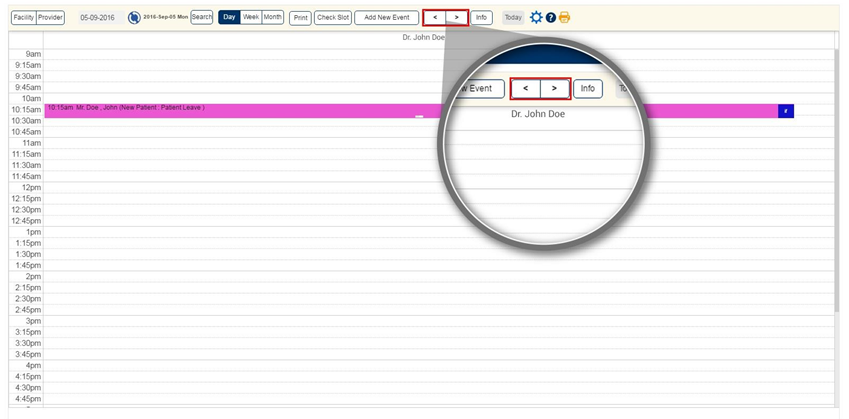
- Use the arrow keys on
 top of the screen, to navigate between dates.
BlueEHR allows users to:
- Search for appointment
- Set up an appointment
- Editing an appointment
- Move an appointment
- View info on an appointment
- Print a schedule
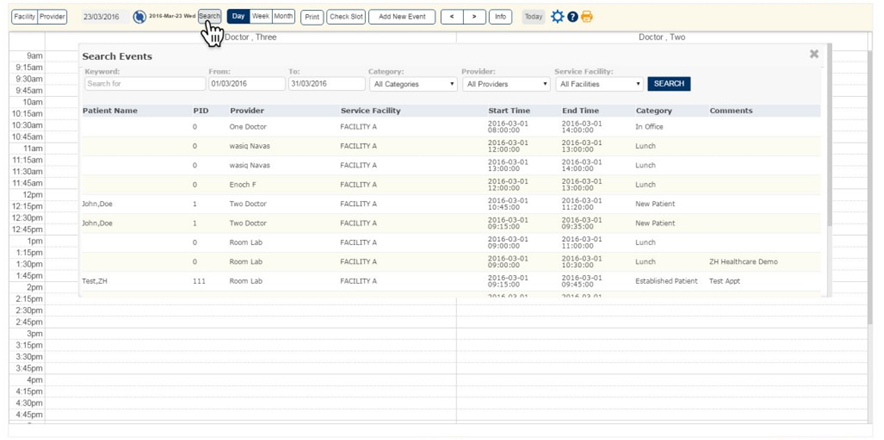
Searching for an appointment
BlueEHR allows a user the ability to search for a specific appointment or event. The user can search by Keyword, Date, Category, Provider and Facility.
- Click on the Search option at the top of the screen.
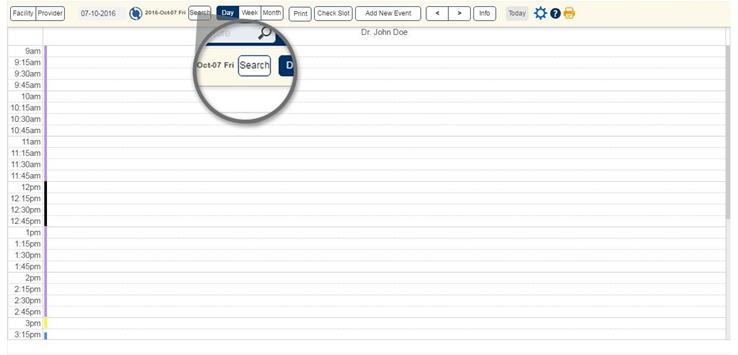
- This opens the Search Events window.
- Choose to search by Keyword, Date, Category, Provider and Facility.
- Click the Search button to start the search and view the results.
Setting an Appointment
1. By manually selecting the time slots
- Open the Calendar
- Click on the cell corresponding to the desired provider and time slot for a particular appointment.
- This will open the Schedule Appointment window.

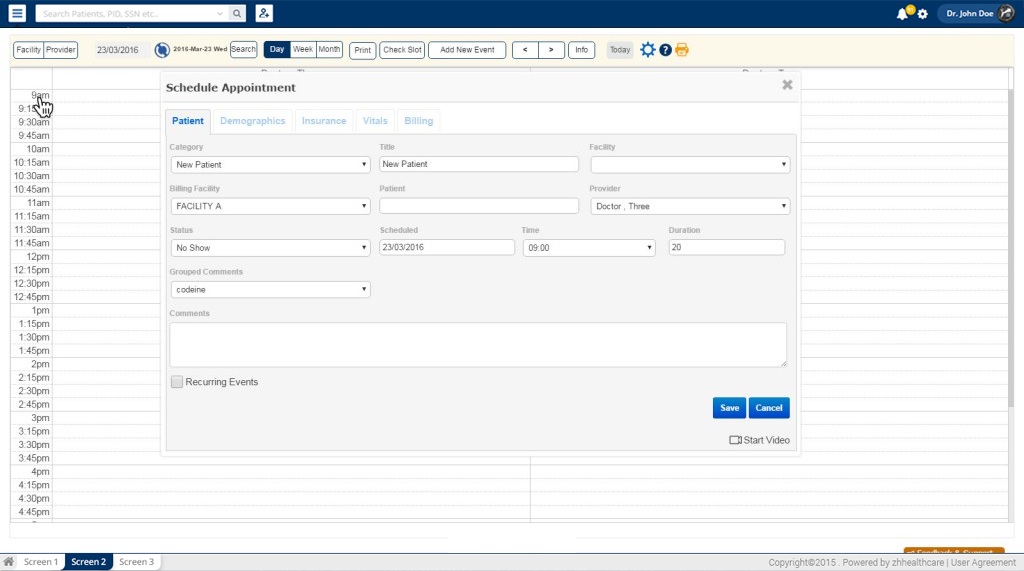
Enter the relevant patient information as explained below
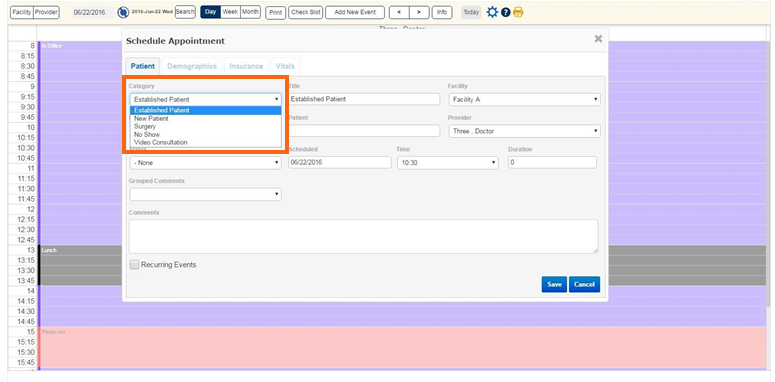
Category
- Defines what type of appointment is being sought for the patient. For Example, New Patient, Established patient, etc. Click on the drop down arrow to select the relevant category.
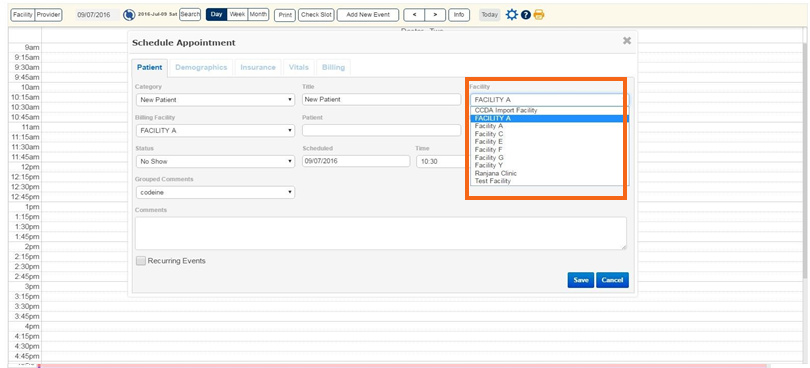
Facility
- Defines the Facility where the appointment needs to be scheduled. The default display will be that of the facility the user has chosen to view initially.
- Click on the drop down arrow to select the proper Facility.
Billing facility
- Defines the Facility used to bill the encounter.
- Click on the drop down arrow to select the relevant facility as required.
Provider
- Defines the provider with whom the appointment needs to be scheduled. The default display will be that of the provider the user has chosen to view
- Click on the drop down arrow to select the relevant provider as required.
Recurring events:
- Helps schedule recurring appointments for a patient.
- Select the Recurring Events at the bottom of the appointment box to make the appointment continue for the length of time entered.
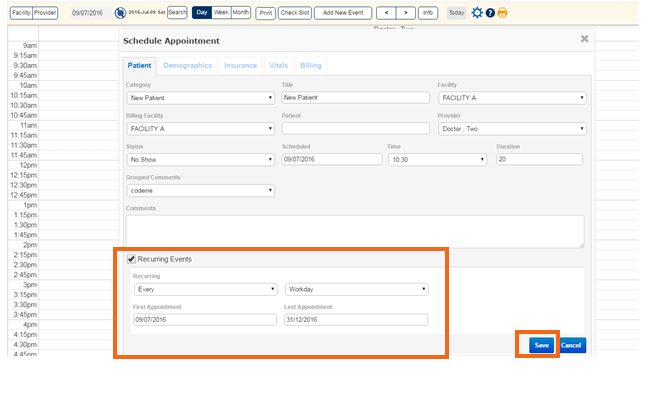
- Once complete, click on Save.The appointment will appear on the schedule.
2. Using the check slot option
BlueEHR allows users to search for empty appointment slots and then schedule appointments, rather than manually search for fee slots.
The Check Slots option will allow a user the ability to search for open time slots where an appointment can be made.
- Click on the Check Slot button.
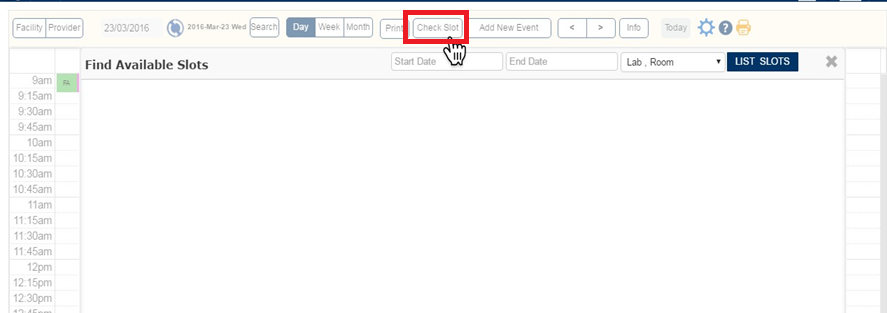
- A Find Available Slots window will appear where the Category, Start Date and End Time and Provider can be entered.
- Select List Slots to view all the available appointment slots for an appointment to be scheduled in.
- Click on the desired time slot to proceed with the scheduling.

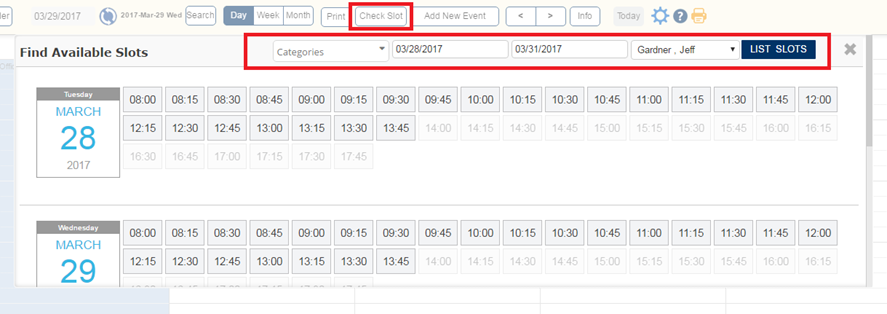
NB: If the provider event is not marked as “in office”, the time slots will be gray and not allow the user to select that time.
Editing an appointment
Once the appointment has been made, it can be edited.
- To edit an appointment, select the relevant appointment and click on the time area of the appointment.

- The Schedule Appointment box opens, where appointment details can be edited.
NB: Clicking on the user name instead of the time area of an appointment will open the patient’s charts.
Moving an appointment
Once the appointment has been made, it can be moved to earlier or later time slots, by merely shifting its position.
- To move an appointment, select the relevant appointment and click on it. Then drag and drop the appointment to a relevant time slot.

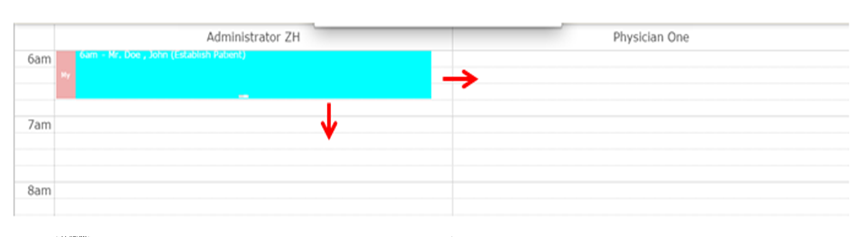
Viewing info of an appointment
Blue EHR has an info button that will allow the user to see what the appointment information is.
- Click on the Info tab on the top right-hand corner of the screen.
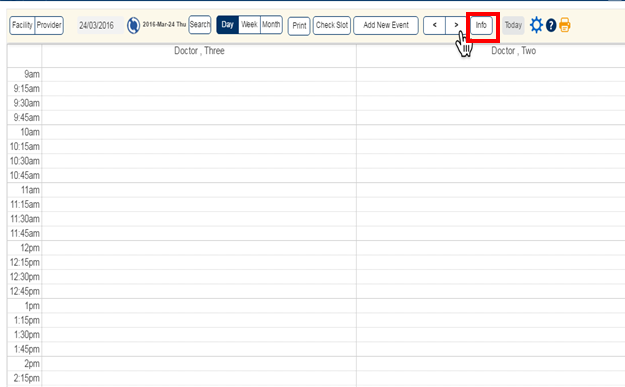
- Place the mouse over the appointment for which you desire to see additional info.
- This will bring the information up on the right side of the screen.

- Clicking on the Info tab once again causes the patient information window to disappear.

Printing a Schedule
Blue EHR has a print option, that allows a user to print a schedule.
- To print a schedule, click on the Print button top of the screen.
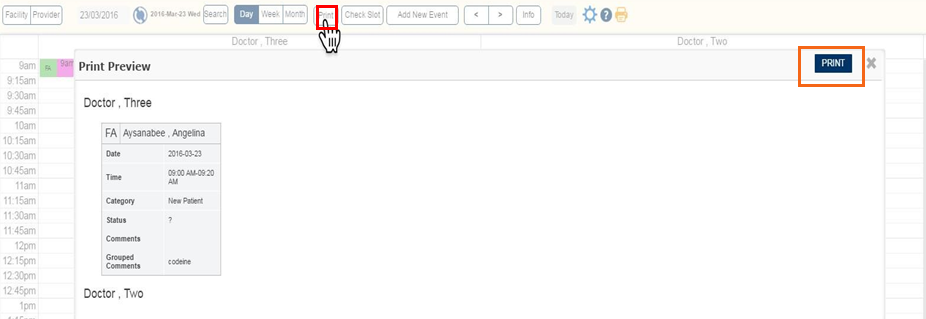
- In the Print Preview window that appears, click on the Print button in the top left corner.
NB: Clicking on the icon![]() at the top right corner gives the screenshot of the appointments window.
at the top right corner gives the screenshot of the appointments window.
Related Videos
Related Courses
Login Preferences | blueEHR Calendar – Slide1
The Calendar / Scheduler helps the user maintain working hours of Facility / Provider. The scheduler
Provider and facility setup | blueEHR Calendar – Slide2
This post will teach you on how to setup Provider and facility in blueEHR Calendar